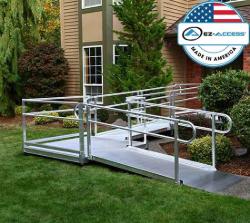
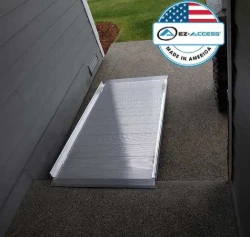
Quick answer: To build a wheelchair ramp, measure the total rise, allow 1 foot of ramp per inch of rise (a 1:12 slope), plan 60-inch level landings at the top, bottom and every turn, and check local permit rules. Then assemble a modular aluminum kit on adjustable legs, or frame a wooden ramp on concrete footings.
By Eric Jungersen, President of Express Ramps, a wheelchair ramp retailer since 1999. Updated November 2, 2026.
Whether you call it a wheelchair ramp or a handicap ramp, the planning is the same. A safe ramp depends on getting the slope, width and landings right before you buy a single part. This guide covers that plan, then walks through both ways to build: a modular aluminum kit and a wooden ramp from scratch.
Key Takeaways
- Plan 1 foot of ramp for every inch of rise. Three 7-inch steps need about 21 feet of ramp.
- Allow at least 36 inches of clear width and 60-inch level landings.
- Limit each ramp run to 30 inches of rise, then add a level rest landing.
- Call 811 before you dig or anchor, and check permit and HOA rules before you order or build.
- A kit bolts together on adjustable legs. A wooden ramp usually needs concrete footings and a contractor.
Wheelchair Ramp Dimensions to Build To
Private homes usually do not have to meet the ADA, but most contractors and inspectors use these numbers as the safety standard. Your local code still decides what is required, so read our residential ramp code guide too.
| Item | ADA standard |
|---|
| Slope | 1:12 maximum, or 1 inch of rise per 12 inches of ramp |
|---|
| Rise per run | 30 inches maximum, then a level landing |
|---|
| Clear width | 36 inches minimum, measured between handrails |
|---|
| Top and bottom landings | Level, at least 60 inches long and as wide as the ramp |
|---|
| Landings at a turn | At least 60 x 60 inches clear |
|---|
| Handrails | Both sides when the rise is over 6 inches, 34 to 38 inches high |
|---|
| Edge protection | A curb or rail along the sides so wheels cannot roll off |
|---|
Source: U.S. Access Board guide to ramps and curb ramps. The standard has more detail and exceptions.
How to Plan a Wheelchair Ramp in 5 Steps
- Step 1: Measure the total rise. Measure straight down from the top of the door threshold, porch or deck to the ground where the ramp will end. Over steps, measure the full height to the top landing rather than counting one step.
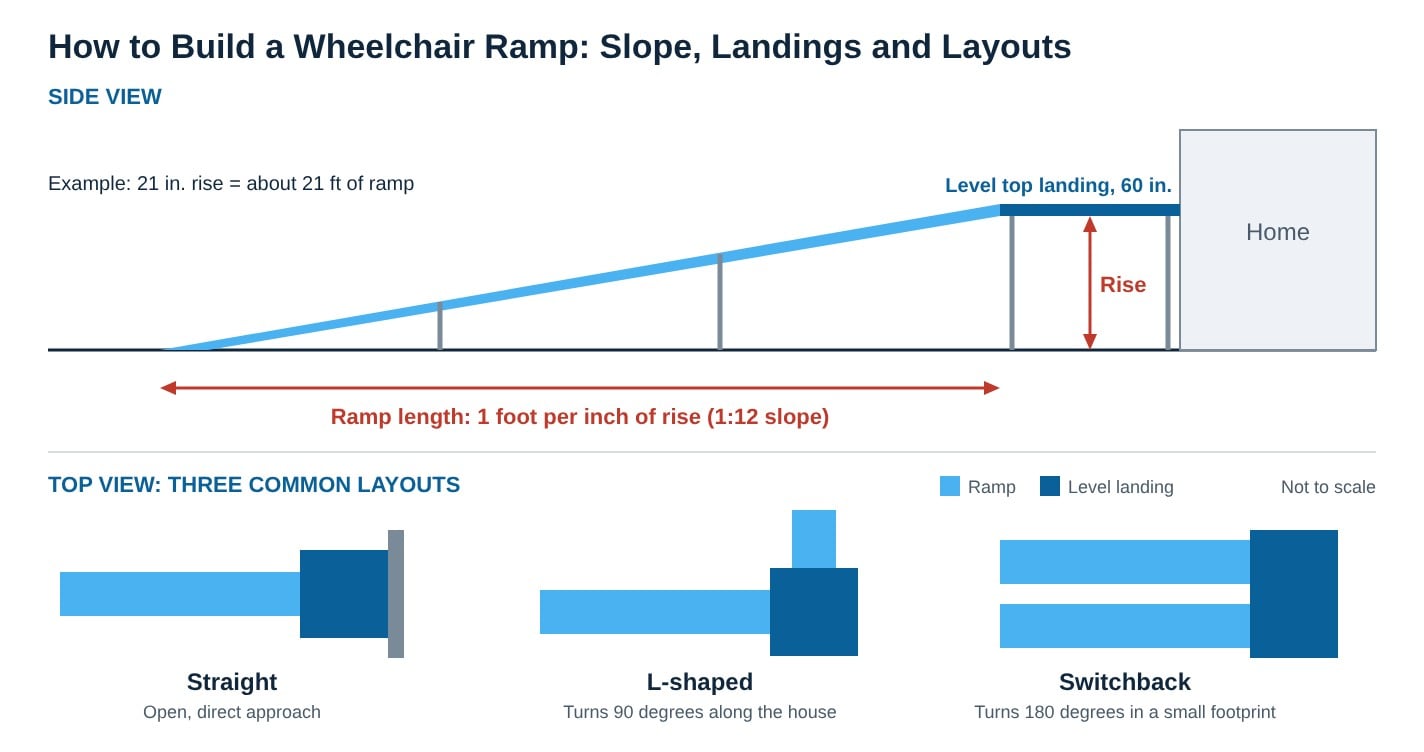
- Step 2: Calculate the ramp length. Allow 1 foot of ramp per inch of rise. A 21-inch rise needs about 21 feet of ramp, plus landings. The Ramp Wizard and ramp sizing guide can do the math. Check your wheelchair or scooter manual for its slope limit too.
- Step 3: Plan the landings and layout. Go straight if you have the room. Use an L-shaped ramp to turn 90 degrees along the house, or a switchback to turn 180 degrees and fit a long ramp into a small footprint. If the door swings out, the top landing must let the user sit clear of the door.
- Step 4: Check codes and permits. Ask your local building department what applies, and ask your HOA if you have one. Many areas require a permit for a permanent ramp.
- Step 5: Prepare the site. Call 811 to locate buried utilities before you dig or anchor. Clear the path, confirm the ground is firm and drains well, and leave room at the bottom for a wheelchair to turn and move away.
Kit or Wood: Which Way Should You Build?
| Modular aluminum kit | Wooden ramp |
|---|
| Typical cost | From $1,000 for a complete kit | About $2,000 to $10,000 or more when contractor built |
|---|
| Build time | A straight kit in as little as 30 minutes; most L-shaped and switchback ramps in a few hours with two people | Usually several days on site |
|---|
| Support | Adjustable legs; no concrete in most installations | Concrete footings usually required |
|---|
| Upkeep | Occasional sweeping and a bolt check | Sealing, staining, board and fastener replacement |
|---|
| When needs change | Add, remove or rearrange sections, or resell it | Usually demolished |
|---|
See the full wood vs aluminum cost comparison for the numbers behind this table.
How to Assemble a Modular Aluminum Ramp Kit
These steps follow the assembly order for an EZ-ACCESS PATHWAY 3G ramp kit. They are an overview, so follow the full assembly manual for your layout, including every torque value and warning.
Tools the manual typically calls for: 1/2, 9/16 and 5/16 inch sockets or wrenches, power drill with 1/8 and 5/16 inch bits, 5/32 and 3/16 inch Allen wrenches, #2 Phillips screwdriver, pliers, level, 25-foot tape measure, rubber mallet, hammer, box knife, file and construction adhesive. Add a 1/4 inch masonry bit if you are anchoring to concrete.
- Step 1: Check the parts. Lay everything out and identify each component before you start. Your layout may not use every part in the manual.
- Step 2: Set the platforms first. Slide the support tubes into the corner pockets, stand the platform up, add the feet, then level it and tighten the set screws. On soft soil, a foot may need a concrete pad.
- Step 3: Connect the ramp sections. Place them walking surface down on cardboard or lawn, butt the ends together with no gap, and bolt on the connector brackets. Join no more than three sections at a time, then turn them upright.
- Step 4: Attach the ramp at the top. At a platform, set the ramp on the hangers that hook into the platform side rail. At a porch or deck, overlap the upper transition plate onto the surface as far as possible and anchor it to wood or concrete.
- Step 5: Install the support legs. Bolt on the leg brackets, level them, insert the legs into the feet, and lift the ramp to take out any sag. Keep the sections parallel. The manual gives 1:12 as the ideal slope and says not to install outside 1:14 to 1:8.
- Step 6: Fit the ground transition. Lift the low end of the ramp, hook in the upper section of the transition, then slide on the other sections and fasten them. It gives a smooth roll from the ground onto the ramp.
- Step 7: Add the handrails. Install them after the ramps and platforms are in place, with the bolts loose until every piece is on, then tighten. Handrails are required on this system.
- Step 8: Finish and check. Secure ramps to platforms with the end clips, cover all handrail ends and side rail corners, and confirm every fastener is tight. Walk the full ramp to check for movement before anyone rolls on it.
Know when to get help. The PATHWAY 3G manual says the system must be installed by a qualified installer. If you are not confident reading the manual, using the tools or judging the ground, hire a contractor or handyman. Nobody should walk on the ramp until assembly is complete. Walking surfaces over 36 inches high need angle braces, and over 72 inches need cross braces as well. In high-wind or seismic areas, ask about the tie down kit, since local code may need engineered anchoring.
How to Build a Wooden Wheelchair Ramp
Most homeowners hire a contractor for a residential wood wheelchair ramp, because it is a structure that must carry a person and a heavy chair for years. This is the usual sequence, not a set of engineered plans. Have your design approved by your building department before you start.
- Step 1: Get a design and permit. Base the design on your plan above, and have lumber sizes and spans confirmed for your load and local code.
- Step 2: Lay out the ramp. Call 811, then stake and string the outline, checking that it is square.
- Step 3: Pour the footings. Dig below the frost line at each post location, set post anchors in concrete and let it cure.
- Step 4: Frame the top landing. Build it first, level it and fasten it to the house so the deck surface sits flush with the threshold.
- Step 5: Frame the ramp. Set the posts, then run pressure-treated joists from the landing to grade at no steeper than 1:12, typically no more than 16 inches apart.
- Step 6: Install the decking. Lay boards across the direction of travel, and add grit strips or non-slip coating, since wood gets slippery when wet.
- Step 7: Add rails and curbs. Install handrails on both sides at 34 to 38 inches, plus side curbs so wheels cannot roll off.
- Step 8: Smooth the bottom transition and get inspected. Remove any lip where the ramp meets the ground, sand rough edges, and schedule any required inspection.
Common Mistakes When Building a Ramp
- Sizing to fit the yard rather than the rise. A ramp that is too short ends up too steep. Add a turn before you shorten the slope.
- Skipping the top landing. A user cannot open an outward-swinging door from a sloped surface.
- Laying a ramp on the steps. A ramp over stairs should run from the top landing and stand on its own supports, not rest on the treads.
- Trusting soft ground. Soil settles under feet and footings, which changes the slope. Use pads, and a landing pad where the bottom of the ramp meets soft ground.
- Leaving out maintenance. Check for loose or worn parts, and keep the surface clear of snow, ice and debris. See our ramp care tips.
Frequently Asked Questions
Can I build a wheelchair ramp myself?
Many homeowners with basic construction skills can assemble a modular kit, though the PATHWAY 3G manual calls for a qualified installer. A wooden ramp is a bigger job, involving footings and framing, and most people hire a contractor. Check local permit rules either way.
How long should a ramp be for 3 steps?
Add up the step heights. Three 7-inch steps make a 21-inch rise, which needs about 21 feet of ramp at a 1:12 slope, plus landings.
How do you build a wheelchair ramp over steps?
Treat the steps as one total rise. Build a level landing at the top, then run the ramp away from the door on its own legs or posts, turning it if needed. Do not rest the ramp on the stair treads.
How wide should a wheelchair ramp be?
ADA standards call for at least 36 inches of clear width between handrails. Local codes may differ, and a wider ramp may suit larger scooters.
How steep can a wheelchair ramp be?
The ADA maximum is 1:12, or about 4.8 degrees. Always stay within the slope limit in your wheelchair or scooter manual.
Do I need a landing on a wheelchair ramp?
Yes. ADA standards call for level landings at the top and bottom of each run, at every change in direction, and after every 30 inches of rise.
Do I need a permit to build a wheelchair ramp?
Often, especially for a permanent wooden or concrete ramp. Modular aluminum ramps are often treated as temporary medical equipment, but rules vary, so check with your local building department.
How much does it cost to build a wheelchair ramp?
A contractor-built wooden ramp usually runs about $2,000 to $10,000 or more. PATHWAY 3G aluminum kits start at $1,000 with free shipping to the contiguous U.S. The total depends on length and platforms.
Does Medicare pay for a wheelchair ramp?
Original Medicare generally does not. Some Medicare Advantage plans, Medicaid waivers, VA benefits and state programs may help. See our guide to ramp costs and financing.
This guide is general information, not engineering or legal advice. Requirements vary by location, so confirm them with your local building department, and always follow the manufacturer's instructions.